Content by: FlexRadio Service Department
Items needed:
- A table, workbench, or flat surface that provides a safe and secure environment for accessing all sides of Power Genius XL.
- Screwdriver with Phillips #1 head.
- Compressed air.
Instructions:
- Turn off the Power Genius XL via the On/Off Toggle switch on the rear of the Power Genius XL.
- Disconnect all cables from the rear of the Power Genius XL. Check to make certain the Power Genius XL AC power cord is disconnected.
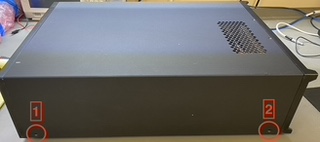
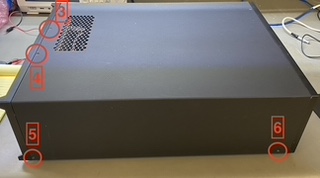
- Place Power Genius XL on a safe workspace and remove the top cover by removing six (6) screws. Place cover to the side.


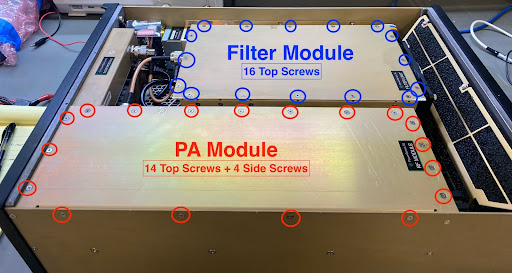
- Remove Filter Module cover by removing sixteen (16) Phillips screws. Place cover to the side.

- Remove the PA Module cover by removing fourteen (14) tops screws and four (4) side screws. Place cover to the side. (See above)
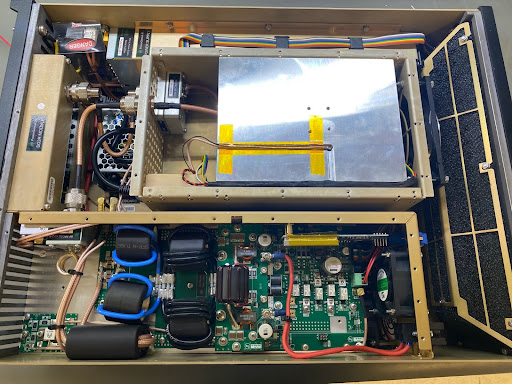
- Using compressed air, blow out the front filter from both directions to free and remove any accumulated dirt.

- Using compressed air, blow out the Filter Module and PA Module.
- Continuing blowing out all interior spaces until completely clear of dust.
- Reinstall PA and Filter Module covers.
- Reinstall Power Genius XL cover.
- Reconnect all cables.
- Turn on Power Genius XL via the On/Off Toggle switch.
- Confirm SELF TEST passes and Power Genius XL Utility reconnects to Power Genius XL.
