The SmartSDR LAN Remote feature uses the Windows default Playback (speaker / headphones) and Recording (microphone) audio devices.
In general, on Win7 and Win 8.x PCs, when plugging a headset into an existing sound card or USB based audio device into a PC, Windows will automatically designate the newly inserted device as the default sound device, and after a short time will activate it, making LAN Remote a "plug-n-play" feature. For example, your speakers will be deactivated for as long as you have your USB headset plugged in.
However there are cases when you may need to manually set the appropriate sound device as the default and the procedure below will explain how to accomplish that task.
How To Change The Default Playback (speakers) Device
Physically connecting your headset to the PC running SmartSDR for Windows is the first step. Now to change it to be the Windows default playback and recording device.
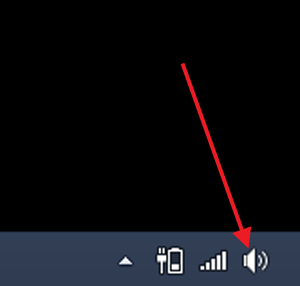
The simplest and most direct way to change your playback device works the same way in Windows 7 and Windows 8.x. Find the icon for Sound in the notification area (lower right corner of your screen) and right-click or press and hold it.
You'll see a menu that offers several choices: Open Volume Mixer, Playback devices, Recording devices, Sounds and Volume Control options.
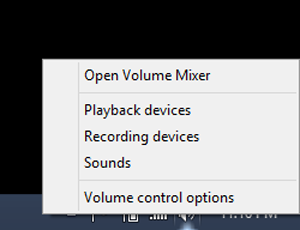
Select the Playback devices to open the Sound Control Panel.
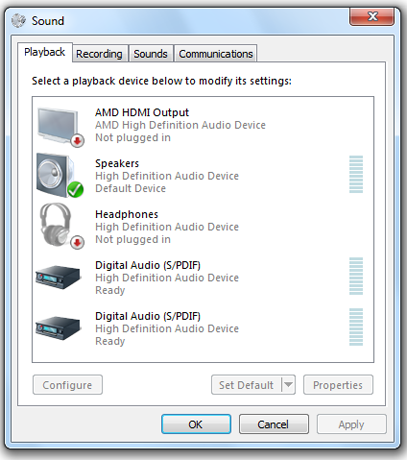
When you click on the Playback tab, a window will pop up that shows you the devices available on your system. Each system is different, so what you see will reflect that. You can also see which devices are actually available (as you can see in this Windows 7 screenshot, some devices are not plugged in). Your current default device will be indicated by a green check mark. In the example above the default playback sound device is the PC speakers connected to the High Definition audio device.
You can select (click) on any available device, and then choose Set Default. If you're happy with your new choice, click OK, and you're done.
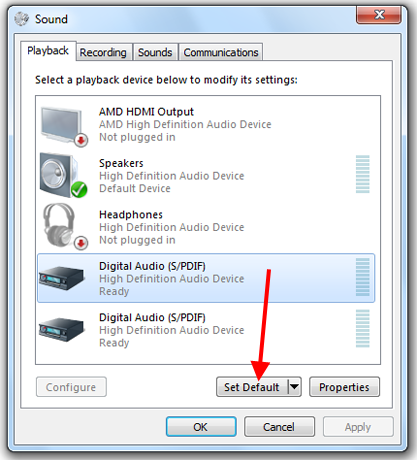
NOTE: You can set different default devices for communications and for recording. SmartSDR for Windows only uses the Default audio device, not the default communication device.
How To Set The Default Recording (Mic) Device
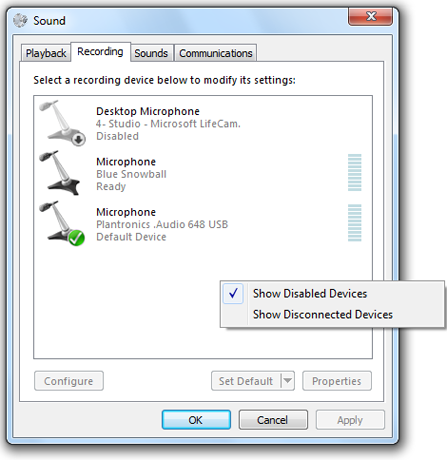
Go to the Sound Control Panel, as described above, and click on the Recording tab. Here you'll see the audio devices you have available that can be used as a microphone. Again, your current default device is indicated by a green check mark. Select your preferred device and click Set Default, just as you did for Playback.
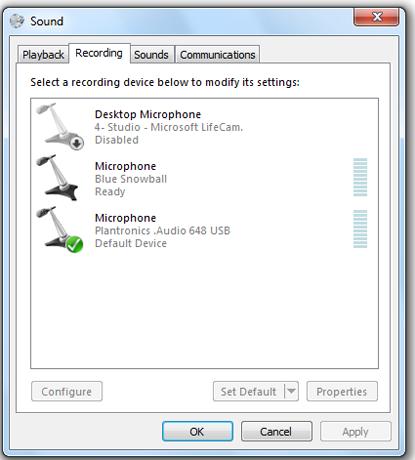
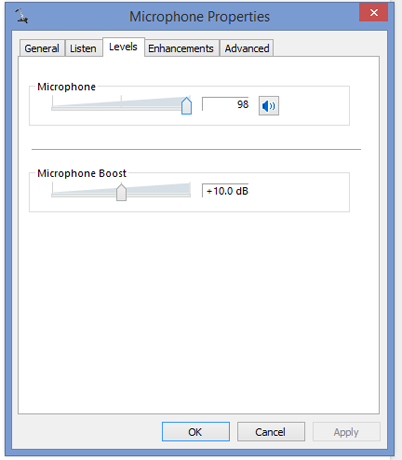
You can see if the recording (mic) device is working by watching for movement in the audio gain meter bar beside each device. If you don't see any movement while speaking into the mic, you may need to configure your device to make sure it is not muted or turned down too low to register. Click on Properties, and then choose the Levels tab.
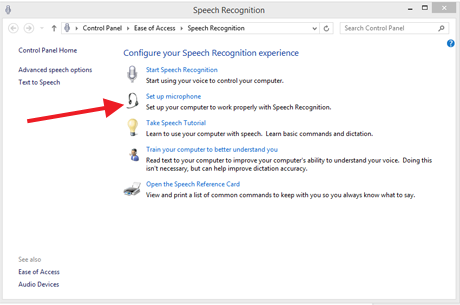
If changing the levels doesn't work, select your device and click the Configure button. This will take you to the Ease of Access window (don't worry, this works for all sound device configurations). Click Set up microphone. Windows will walk you through a few simple steps to get your microphone working.
Troubleshooting: I Can't See My Sound Device Listed
But what if you want to change to another audio device and you don't see it listed?
By default, Windows does not show you devices that are disabled or disconnected. If your device is not listed, right-click anywhere in the blank space in the Sound Control Panel window to show the display options. You can then choose to see the devices that would otherwise be invisible.
