
This article shares how to set up and send email via Winlink Express and VaraAC with SmartSDR
Download and install RMS Express here: https://winlink.org/WinlinkExpress
Download and install Vara AC HF here: https://rosmodem.wordpress.com/
Make sure in SmartSDR in the CAT panel, you have both a CAT port and a dedicated PTT port. In my example, COM is my CAT port and COM6 is my dedicated PTT port. Create Slice A DiGiU/3K and enable DAX 1 with TX. Enable the DAX button on the P/CW Panel.
In SmartSDR also make sure you go change the filter. Go to Settings > Radio Setup > click on the Filter Tab.
On the Radio Control panel then change the filter width(highlighted in the red box) to about 3500 or something close to it.
Open Winlink Express and click on Settings -> Winlink Express Setup
Enter your call sign and 6-figure Grid Locator and Registration contact information. If you have set up Winlink Express before, this information may populate automatically for you.
Put in your Password Recovery email and click update.
Click Message -> New Message. In the To: field, if you put an email-formatted address with an @ sign, the gateway will try to deliver it out of the WinLink system onto the internet. If you simply place a call sign, such as K5SDR, it will keep it in the system and try to deliver it to that ham when they check for email on any node.
When you send your first email, the WinLink system will create your account. If you do not use it within a certain time period again, the system will delete your account.
Fill out the various portions of the email just as you normally would, but be brief. Remember, this is going over HF, and bytes are slower.
Click on Post to Outbox. Now you have an email queued for delivery.
Make sure "VaraHF Winlink" is selected in the Open Session drop-down box and click "Open Session."
This opens the VaraHF session manager and TNC. We now need to set up the specifics for the radio.
Click on Settings -> Soundcard. Select the DAX Audio RX 1 for Device Input and DAX Audio TX for Device Output. Set the drive level at about -6dB to start. You may have to change this depending on your audio level in Smart SDR. Click Tune to see if it engages the radio.
Disregard the 1/3 ALC above; that is a screenshot from an Icom radio that is part of the screen.
Click on Setup -> Radio Setup. Pick Flex radios from the radio model. Pick "USB Digital" mode. Set your Radio Control Port to COM(X) or your selected port and PTT Port to Flex. It is required to use a dedicated PTT port to get the quick response required for VaraAc. Leave everything else.
Click Update. This will restart the TNC.
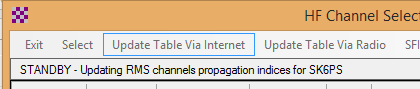
Click on the Channel Selection button. It will open a new window.
Click on "Update Table via Internet" to download an initial list of gateways. Once the propagation paths are calculated, sort by Path Reliability.
RMS Express will show you all channels. Double-click the gateway for the best band for your station's capabilities. It should now switch to that band and check for busy status. Make sure your station is ready for transmit (i.e., tuned, power, etc), and click Start. It is very cool to watch this system work. It is very robust and reliable. Please watch this video for a full demo of sending an outbound email.
https://www.youtube.com/watch?v=96HzIabCJvw