Content provided by: Richard, AE6XO
The following is a step-by-step guide for configuring PowerSDR for WINMOR when using a FLEX-3000 or FLEX-5000.
1. Create a virtual audio cable pair using the Virtual Audio Cable software. It is available from this website: http://software.muzychenko.net/eng/vac.htm
You must purchase this program. The free version transmits periodic voice announcements that will corrupt your digital data. The latest version is 4.15.0.

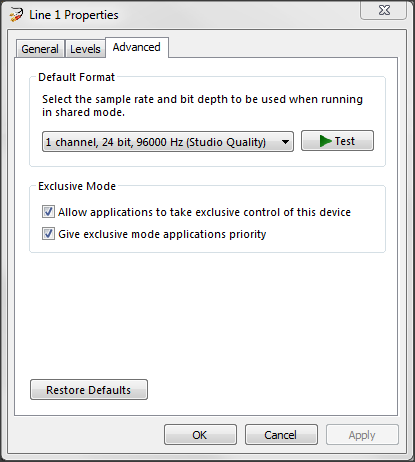
2. Stop PowerSDR and synchronize the sample rate between VAC and Windows 7 sound devices. Go to the Windows Control Panel/Hardware and Sound/Manage audio devices. In the Sound window, choose Playback and select Line 1, then Properties, and then Advanced. Set the Default Format as shown below. Click OK.
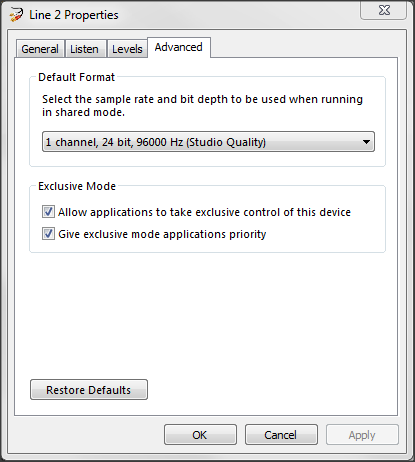
3. Select the Recording tab in the Sound window and select Line 2. Make the settings as below.
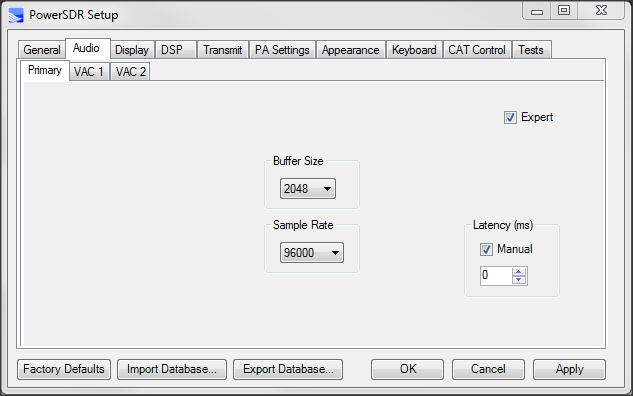
4. Restart PowerSDR and choose the Audio/Primary window, set the Buffer Size, Sample Rate, and Latency as shown below.
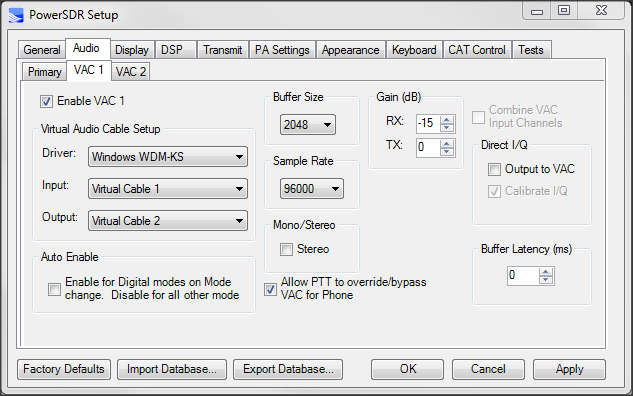
5. In the Audio/VAC 1 window in PowerSDR, enable VAC 1 and make the settings as below. It is not necessary to change the settings on the VAC 2 tab.
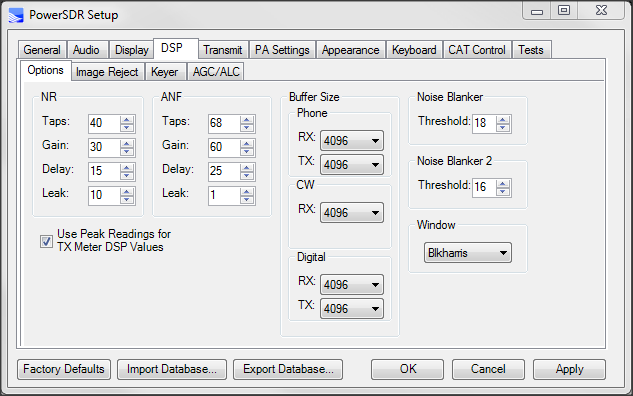
6. In PowerSDR Audio/DSP/Options, set the DSP Digital RX and TX buffer sizes.
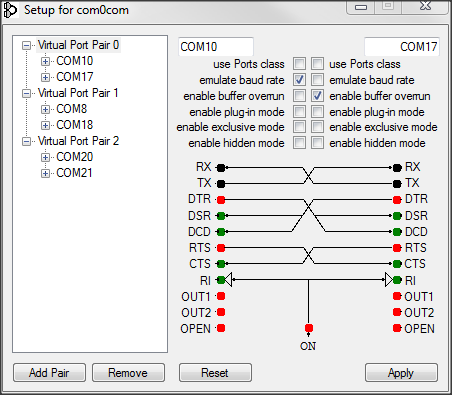
7. Download com0com from http://com0com.sourceforge.net/. There will be a "Pair 0" Virtual Port. Create two additional virtual COM port pairs by clicking "Add Pair." If you find that some COM ports are already in use, select different ones than in the screen capture below. Make a note of the COM port pairs.
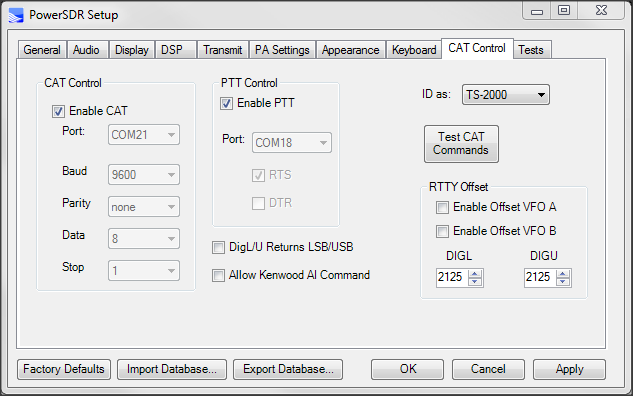
8. In PowerSDR CAT Control, use COM21. Use COM18 for PTT control. Note that RTS is checked. (If you used different COM port pairs in com0com, make sure you use separate virtual ports for these settings. You will use the "pair mates" later on when setting up WINMOR.)
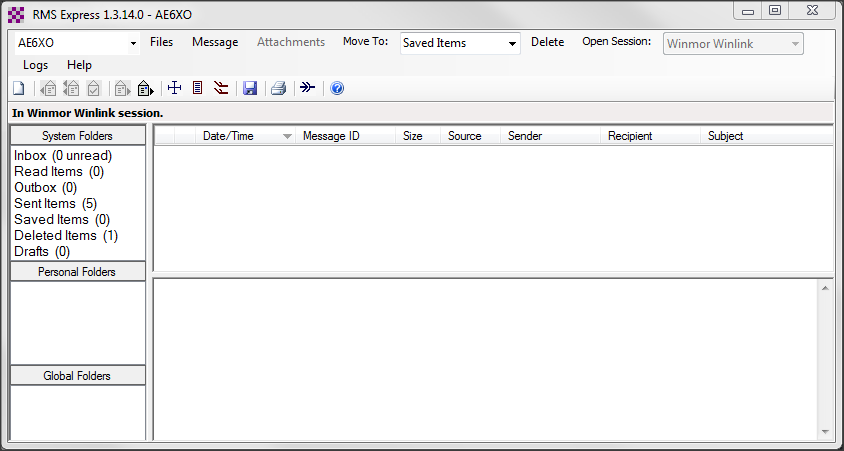
9. Install RMS Express and WINMOR using the instructions on the Winklink website. (RMS Express requires a password to be entered during the setup. It is used when you send/receive emails.)
10. In RMS Express, select Winmor Winlink from the dropdown menu and then click Open Session.
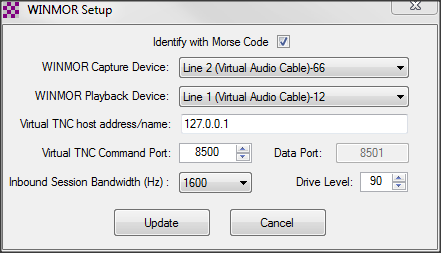
11. In the Winmor Winlink Session window, select Setup/WINMOR TNC Setup. Configure the settings as shown below.
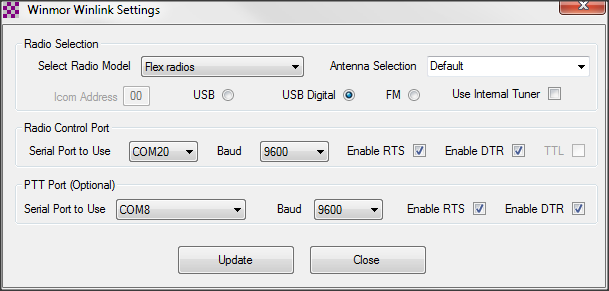
12. In the Winmor Winlink Session window, select Setup/Radio Setup. Configure the settings as shown below. (If you used different COM port pairs in com0com (Step 7) than in these instructions, be sure you use their pair mates here for the Radio Control Port and PTT Port. In this example the two pairs in com0com Step 7 are COM8 + COM18 and COM20 + COM21. COM21 was chosen in Step 8 for CAT control and COM18 was chose for PTT. In the window below, COM20 is used for radio or CAT control and COM8 is used for PTT.)
13. Setup is complete. Initiate a WINMOR session just as you would do with an external sound card.
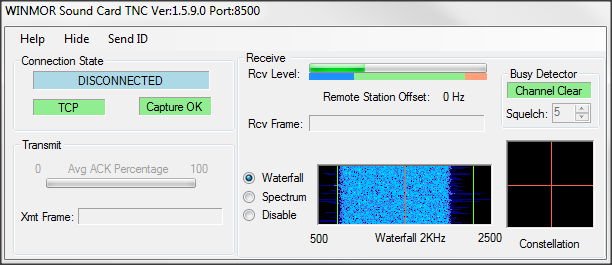
14. If you find that the receive gain is too high or too low in WINMOR, you can adjust this in the VAC 1 window in Step 5 (Gain dB/RX). The receive volume is shown in the Rcv Level bar below and should be in the green area when receiving a WINMOR station. (You may find that you can hear a WINMOR station's transmission, but not connect to it. This may be because the receive gain is too low.)
