Installing the FLEX FireWire Driver - For Windows
The directions below will instruct you how to properly install the FLEX Firewire driver for the Firewire-based FLEX software defined radios. The screen shots used in the procedure are from a Windows XP operating system. The screens will look a little bit different when installing on Windows Vista and Win7 due to the way Vista and Win7 renders dialog boxes, but the window content is identical. Also, the FLEX Firewire driver version numbers will be a bit different too.
Step 1. Download PowerSDR v2.7.2 - it contains the latest Firewire device driver for the FLEX-5000 and FLEX-3000.
Before we start, it is always a best practice to to close down any running applications before installing any type of hardware device driver. Open applications may inadvertently interfere with the proper installation of the Firewire device driver.
NOTE: The FLEX software defined radio *MUST* be completely turned off or disconnected from your computer before starting this procedure. You will be instructed when to connect or turn on your FLEX software defined radio in the procedure below.
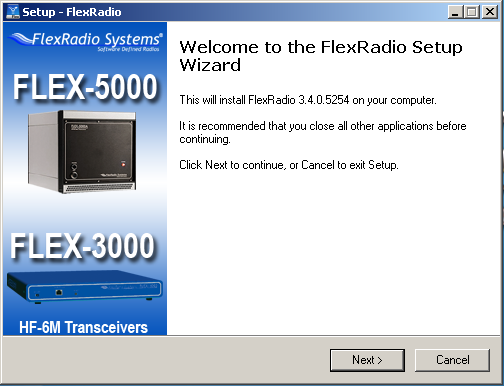
Step 2. Run the PowerSDR v2.7.2 Installer. At the end of the installaion process, the FLEX Firewire driver will install. After the FLEX Firewire driver Setup Wizard is displayed, left click on NEXT to begin the driver installation.
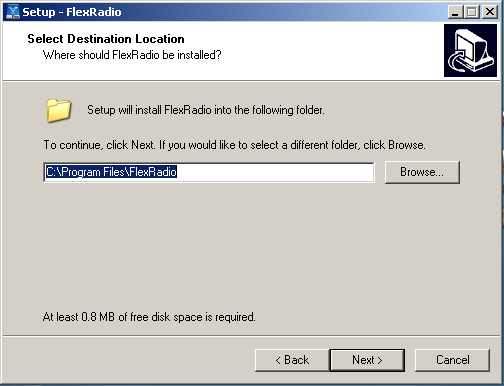
Step 3. After clicking the NEXT button, the Select Destination Location screen is displayed. It is recommended that you use the default location of C:\Program Files\FlexRadio. Left click on NEXT to continue.
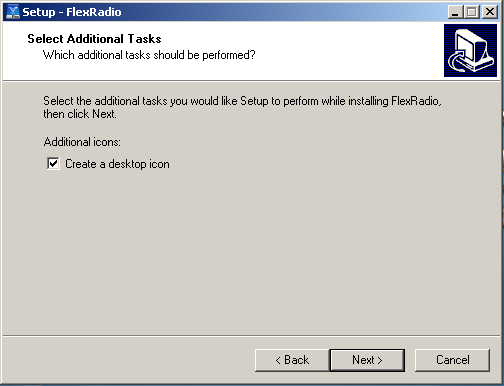
Step 4. After clicking the NEXT button, the Select Additional Tasks screen is displayed. If you do not want the FLEX Firewire Control Panel icon on your desktop, un-check the “Create a desktop icon” option. It is highly recommended that you place a FLEX Firewire Control Panel icon on your desktop. You will use this control panel to manage your software defined radio. Left click on NEXT to continue.
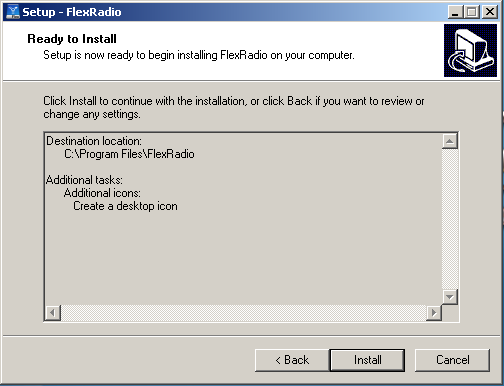
Step 5. After clicking the NEXT button, the Ready to Install screen is displayed. Verify that the options selected in the previous two steps are correct. If not, left click on the BACK button to change any of the incorrect options. Left click on NEXT to continue.
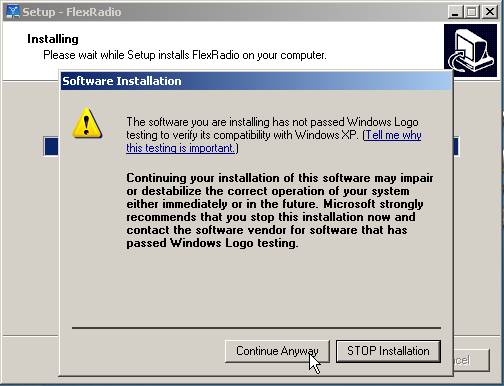
Step 6. After clicking the NEXT button, the Installing screen will be displayed. A Software Installation warning may also appear (if not, skip to Step 7). This warning is displayed because the hardware driver has not passed the formalized Windows Logo Testing program, which is not an issue as most hardware drivers are not Windows Logo certified. The FLEX Firewire driver has been extensively tested and will not destabilize or impair your system. Left click on Continue Anyway to proceed.
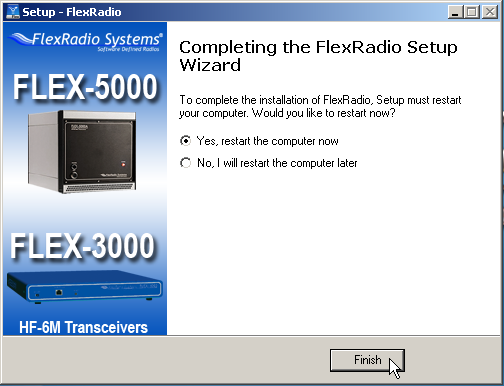
Step 7. After the file transfer is complete, the Completing the FlexRadio Setup Wizard screen will be displayed and you will be prompted to reboot your computer. Please select the option, Yes, to restart the computer now.
Before left clicking on the FINISH button, make sure that your FLEX Firewire-based software defined radio is powered off. THIS IS VERY IMPORTANT. You must complete the driver installation before powering on the FLEX software defined radio.
Once you have verified that the FLEX software defined radio is not powered on left click on the FINISH button to reboot the computer.
Step 8. After your computer has completely rebooted, power on your FLEX software defined radio by pressing the power button.
Windows Vista and Win7 Installation Procedure Deviation: Windows Vista and Win7 performs Steps 8 - 13 without any user intervention or displaying installation status dialog boxes. If you are installing on Windows Vista or Win7, skip to Step 14.
The following steps are applicable to Windows XP only:
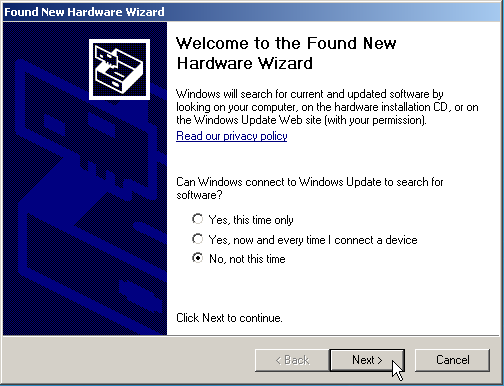
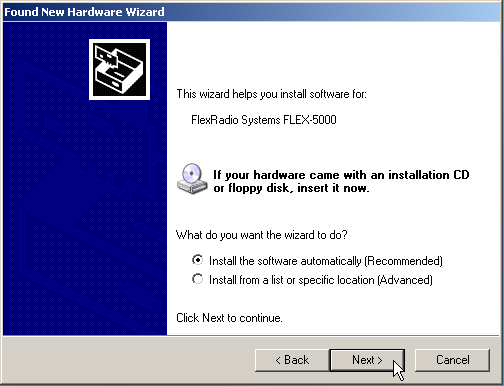
The Found New Hardware Wizard dialog box is displayed once Windows XP discovers that the FLEX software defined radio, a new piece of hardware, has been connected. Select the option, No, not this time when you are prompted to use Windows Update to search for software. Left click on the NEXT button once you have made the proper selection to continue.
Step 9. The Found New Hardware Wizard will recognize that you are trying to install a FlexRadio FLEX software defined radio. Depending on the model of radio attached to your computer, the driver will properly identify the specific FLEX software defined radio you are installing. In the example above, the radio is a FLEX-5000. Select the option, Install the software automatically (Recommended), and left click on the NEXT button once you have made the proper selection to continue.
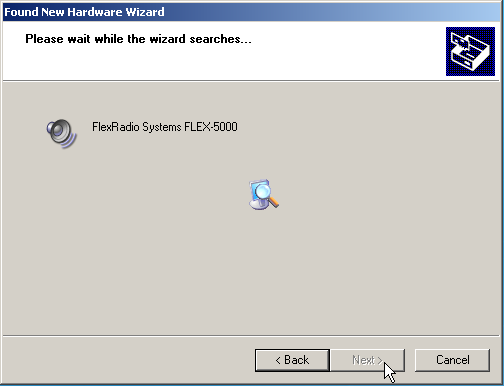
Step 10. After clicking the NEXT button, the Found New Hardware Wizard screen will be displayed momentarily.
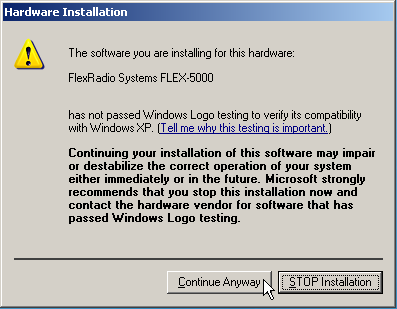
Then a Hardware Installation warning may be shown. This warning, like the one in Step 6 is displayed because the hardware driver has not passed the formalized Windows Logo Testing program. Left click on Continue Anyway to proceed.
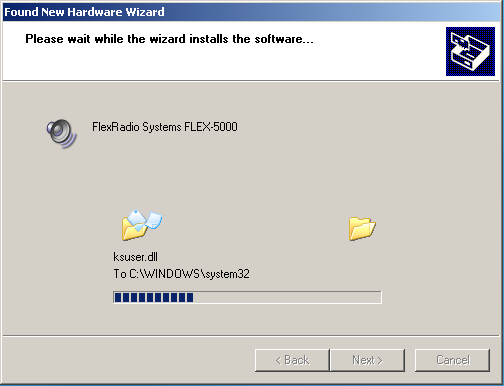
Step 11. After clicking the Continue Anyway button, you will observe the driver files being installed. See the screen below.
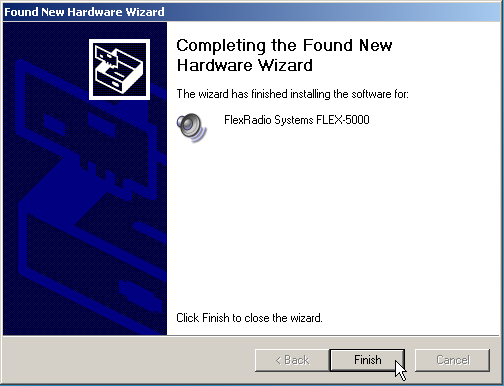
Step 12. After the driver files are installed you will see the Completing the Found New Hardware Wizard dialog box to indicate that the wizard has finished installing the software for the FlexRadio FLEX software defined radio. Left click on the FINISH button to continue.
Step 13. The FlexRadio Systems FLEX Firewire driver has three (3) sub-driver components. The first sub driver, the FlexRadio Systems FLEX-xxxx core driver component was just installed in steps 8 - 12. There are two additional sub-driver components that must installed to complete the driver installation process.
NOTE: After the FlexRadio Systems FLEX-x000 core driver component completes, repeat steps 8 - 12 for the two (2) FlexRadio MIDI drivers. You will install a total of three (3) sub-driver components. Do NOT stop installing the FLEX Firewire sub-drivers until all have been loaded.
After all of the sub-drivers have been properly installed, You should see a prompt in the bottom right had corner of your display that indicates that your new hardware is ready to use.
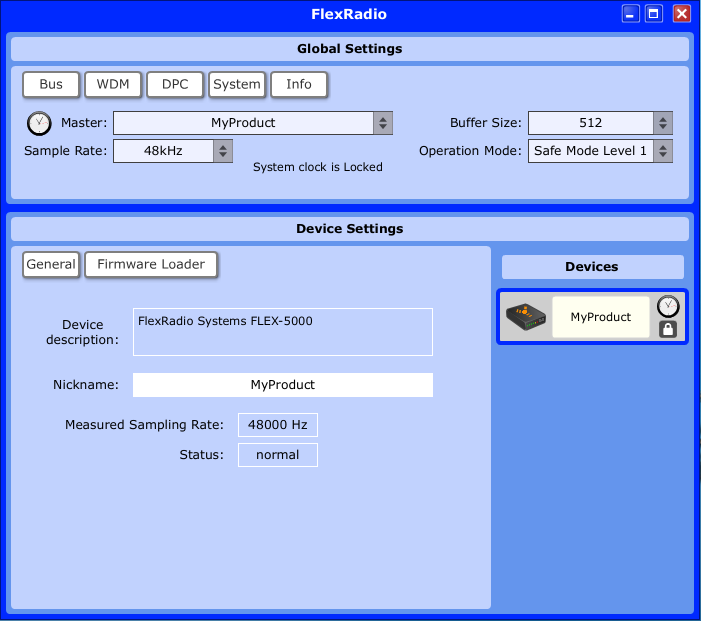
Step 14. The last step is to verify that the FLEX software defined radio is properly communicating with your computer. During Step 4, you should have instructed the driver installer program to place a FLEX Firewire icon on your desktop.
The FLEX Firewire Console icon may or may not look like the icon pictured to the left depending on your driver version, but will have the label "FlexRadio".
![]()
Double click on the FlexRadio icon (see above) to display the FLEX Firewire Control Panel. If the driver was properly installed, you will see the name of your FlexRadio Systems FLEX software defined radio in the Device Description text box. If the driver is not installed properly or the FLEX software defined radio is either not connected or turned off, you will receive a Device Not Found error message when you start the FLEX software defined radio.